Macarons are temperamental, but delicious treats. If just one thing goes wrong, it can throw off the entire batch, causing them to be too flat, too hard, tasteless, etc. When that happens, it can be a little frustrating, as these puppies take a LONG time to make (especially if you only have one rack in your oven, like I have). But when they turn out great, you feel like Queen of the world, baker extraordinaire. I might be able to live off the high of this last batch for a month or two, or maybe just until they’re gone and I need to make more.
When we first moved here, I bought a macaron kit from a specialty cooking store (kind of like a Williams-Sonoma in France). It came with a silicon mat, pastry bags & nozzles, as well as a little recipe book (below). I watched a Martha Stewart YouTube video and tried my hand at some chocolate and mint treats (you can see that post here). I think I made them twice (the white and the chocolate/mint below), but they didn’t turn out well either time (though the taste was still there) as they were a little flat and lacked the distinct “foot” (the little crumbly bit at the bottom). So, after two failed attempts, I decided to seek help from a professional and enrolled in a macaron class at Labo & Gato. This class was unbelievably helpful/informative. Below you’ll see the lemon, pistachio, vanilla, and raspberry macarons in their ideal form, which I made in the class. If that doesn’t make you a believer, nothing will.


I took the class back in June of 2017, but hadn’t tried making them again at home until Jim’s mom came to visit in September (humidity, heat, etc is no friend to the macaron…temperature controlled rooms work best). The batch we made with Gail turned out to be our best (at home) yet (orange & red in above). That is until we made this most recent batch.
So, let me share some of my wisdom from the class:
- Do not buy one of those silicon mats. They are awful. You want to use parchment paper (this will also make it much easier to make numerous batches, as they need to cool completely). If you need a guide (I use one), you can buy one and place it beneath your parchment paper. It’s incredibly handy as you’ll just fill the black center with filling and voila!
- Let your macarons “set” before popping them in the oven. This (I think) might be the most important part/key to them rising/turning out. Before they go in the oven they need to no longer be tacky and definitely not wet. (This part is also much easier if you’re following #1 above)
- Make your filling, first. The longer your filling can cool, the better. For this batch, I made it a couple days in advance and kept it covered in the refrigerator. It makes cleanup a little easier.
- Be sure to have lots of mixing bowls, lots of nozzles, and lots of pastry bags. This will make EVERYTHING so much easier. This last time was the first time I had 3 bowls (for 3 types of macarons), and it was KEY. I currently only have 1 nozzle and 2 bags, but I’ll be buying 3 or 4 of each so I don’t have to wash/dry and re-use. And instead wash all at the end. In the class they used disposable pastry bags, which might be the best way to go, as you can get it over the nozzle (which I think will help to not have the points).
- Don’t stir your sugar for your meringue. Just let it come to temperature all on its own.
- Consider purchasing a double boiler for your ganache (especially the fruit puree ones). We burned MANY attempts trying to get it to 101C in a saucepan. I also HIGHLY recommend buying pre-made puree. We tried blending our own raspberries, but getting the seeds out is a nightmare and it takes SO much longer. Save yourself the trouble.
So, without further ado, please find a recipe for raspberry macarons below. They made the perfect treat for my Valentine!
Macarons framboise (28 pieces 3.5 cm)
Biscuit
- 100g almond flour
- 100g powdered sugar
- 75g egg whites (37g + 38g)
- QS colorant rouge framboise
- 100g sugar
- 25g water
- 2g dried eggs (powdered)
- 1g cream of tartar
Ganache framboise
- 250g raspberry puree
- 5g pectine 325NH95
- 30g sugar
- Citric Acid solution (5g citric acid + 10g water)
Make the raspberry ganache
In a saucepan, heat the fruit puree. In a separate container, combine the pectin with the semolina sugar. Whisk in pectine mixture with fruit puree. Cook to 101 C (add the citric acid mixture). Allow to cool. Stir before adding to piping bag. Garnish the shells.
*I won’t lie, this part is tricky. Months ago we burned/ruined two or three batches. I recommend using a double boiler and know that it takes FOREVER for the mixture to make it to 101C. We’re talking more than 30 minutes (when we were making the most recent batch all the water evaporated out of my double boiler twice! before it reached 101C). So, I broke with the temperature and took it out at 98 or 99C. It seemed fine, so I recommend you follow suit if it’s taking too long.
Make the macaron biscuits
Mix almond powder, powdered sugar, colorant, and half of the egg whites (37 g). Mix ingredients until they form a thick paste (like cookie dough). It’ll require a little elbow grease.
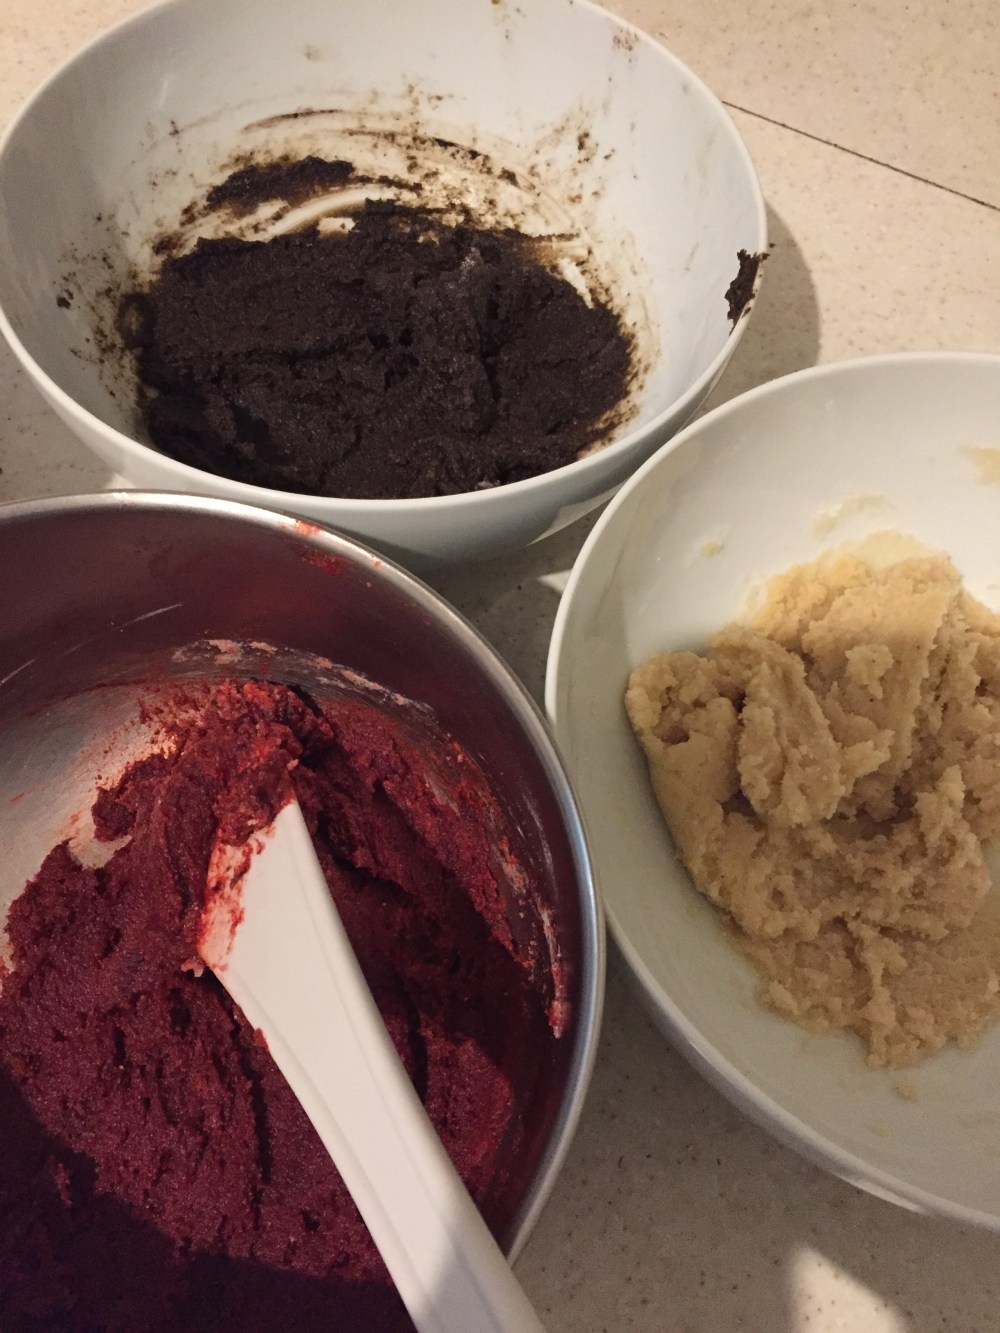
*Now, I feel if you’re making macarons, you probably want to make more than one flavor/type. I typically try to make 3 batches (so triple the recipe above). This can be accomplished by measuring out and making the biscuit paste separately (almond flour, powdered sugar, 37g egg whites, colorant) and then tripling the meringue (you can weigh the mixing bowl while empty, then again with all the meringue and divide into the paste evenly). Below, I made chocolate, raspberry, and vanilla (just added vanilla extract to the paste).
Using a stand mixer with a whisk, begin whisking the remaining 38g of egg whites with the dry egg whites and cream of tartar. Once the whites are “sparkling,” (frothy) make a syrup with the water and castor sugar (do not stir it). Heat up the sugar mixture to 119 C and slowly pour over the egg whites.
*Below you’ll see the “sparkling” egg whites (you can’t tell in this photo, but up close it really does sparkle like diamonds) as well as the sugar.


Whisk until the meringues are stiff, but not too stiff (kinda looks like marshmallow fluff). Stir 1/3 of this meringue into the almond paste to soften it. Slowly add the remaining 2/3 of meringue. The dough/batter should form a firm ribbon.
Add to a pouch with a No. 8 nozzle. Place your parchment paper over your guide and start piping. Once piped, let “set” in a cool place to “dry” before popping into the oven. Once no longer tacky to the touch, Bake for 15 to 16 minutes at 150 C.
After baking, remove from the oven and let cool until parchment paper is easily pulled away from the biscuit. Once cool, match up like sizes and add ganache to pastry bag to fill.


Once you’ve made the sandwiches, eat immediately or chill in the refrigerator for up to three days.
While these didn’t turn out perfect (I need to work on getting the sizes all the same and level/smooth on top), but the taste was phenomenal. Chocolate, raspberry, and vanilla macarons, all filled with homemade raspberry filling. Ladurée doesn’t have much on me (though Pierre Hermé still does)!

These macarons look incredible, so I think all that hard work paid off. That will be one sweet Valentine’s Day.
LikeLike
Thank you! They were definitely a labor of love 🙂
LikeLike